You may not know this, but I wasn’t always a proud employee of this illustrious institution known as Northwestern University. Oh no! I actually had quite a crazy 11-year run as the co-owner of a high-end aquarium company up until 2012. Yup, I sold fish tanks. We specialized in saltwater and reef aquariums, and as such, I became an expert of all things marine.
So when my parents treated me to a vacation down in St. Thomas last year for my birthday, I took full advantage of the reef right outside our door. I went snorkeling for hours every day, clutching my trusty GoPro camera and capturing the magic under the waves. It was glorious! But then I came home and wondered what in the world I was going to do with all this amazing footage. I needed to make a movie, of course! That meant teaching myself how to use iMovie, the one stop shop for turning your raw videos into thrilling films. It was truly addicting, and I had such a blast arranging my clips that I ended up with THREE movies instead of just one. Do you want to join in the fun?
(Watch it in HD if you can!)
Let’s Get Started
First thing’s first – you need some footage! If you already have all of the videos you want to use, great! Just download them to your computer from your camera or phone. Otherwise, a little pre-planning before you yell “action!” will go a long way. Here are a couple of tips:
- Shoot WAY more than you plan to use. Think you already have an obnoxious amount of footage? Go ahead and collect a little more! More is more in this case.
- Consider using a microphone for optimal audio (visit our checkout counter for some suggestions!). Also make sure you pay attention to any ambient noise, as well as the direction of the mic.
- Quality AND quantity are important for your videos. Shoot in the highest definition possible.
- Try to keep the camera as steady as possible (easier said than done when you’re floating in the ocean).
- Review your footage early and often. You don’t want to shoot hours’ worth of videos only to find out that your lens was smudgy.
- And speaking of, make sure you clean your lens.
- If applicable, having a pre-written outline or script for your movie will organize your video clips as you’re shooting. This will help later when you’re sorting through dozens of files and figuring out what to use in the final cut.
- Before deleting the video files from your camera/phone, make sure everything has downloaded properly onto your computer.
Are you done shooting? Wünderbar! Now comes the fun stuff…
The Nitty Gritty
For my little snorkeling movie, I used the latest version of iMovie (10.0.6), which had some rather helpful upgrades from the previous version. If you are unable to install iMovie on your own computer, you’re welcome to use any available MMLC computer, all of which have iMovie installed.
When you open the program, you’ll be greeted with a screen that looks like this:
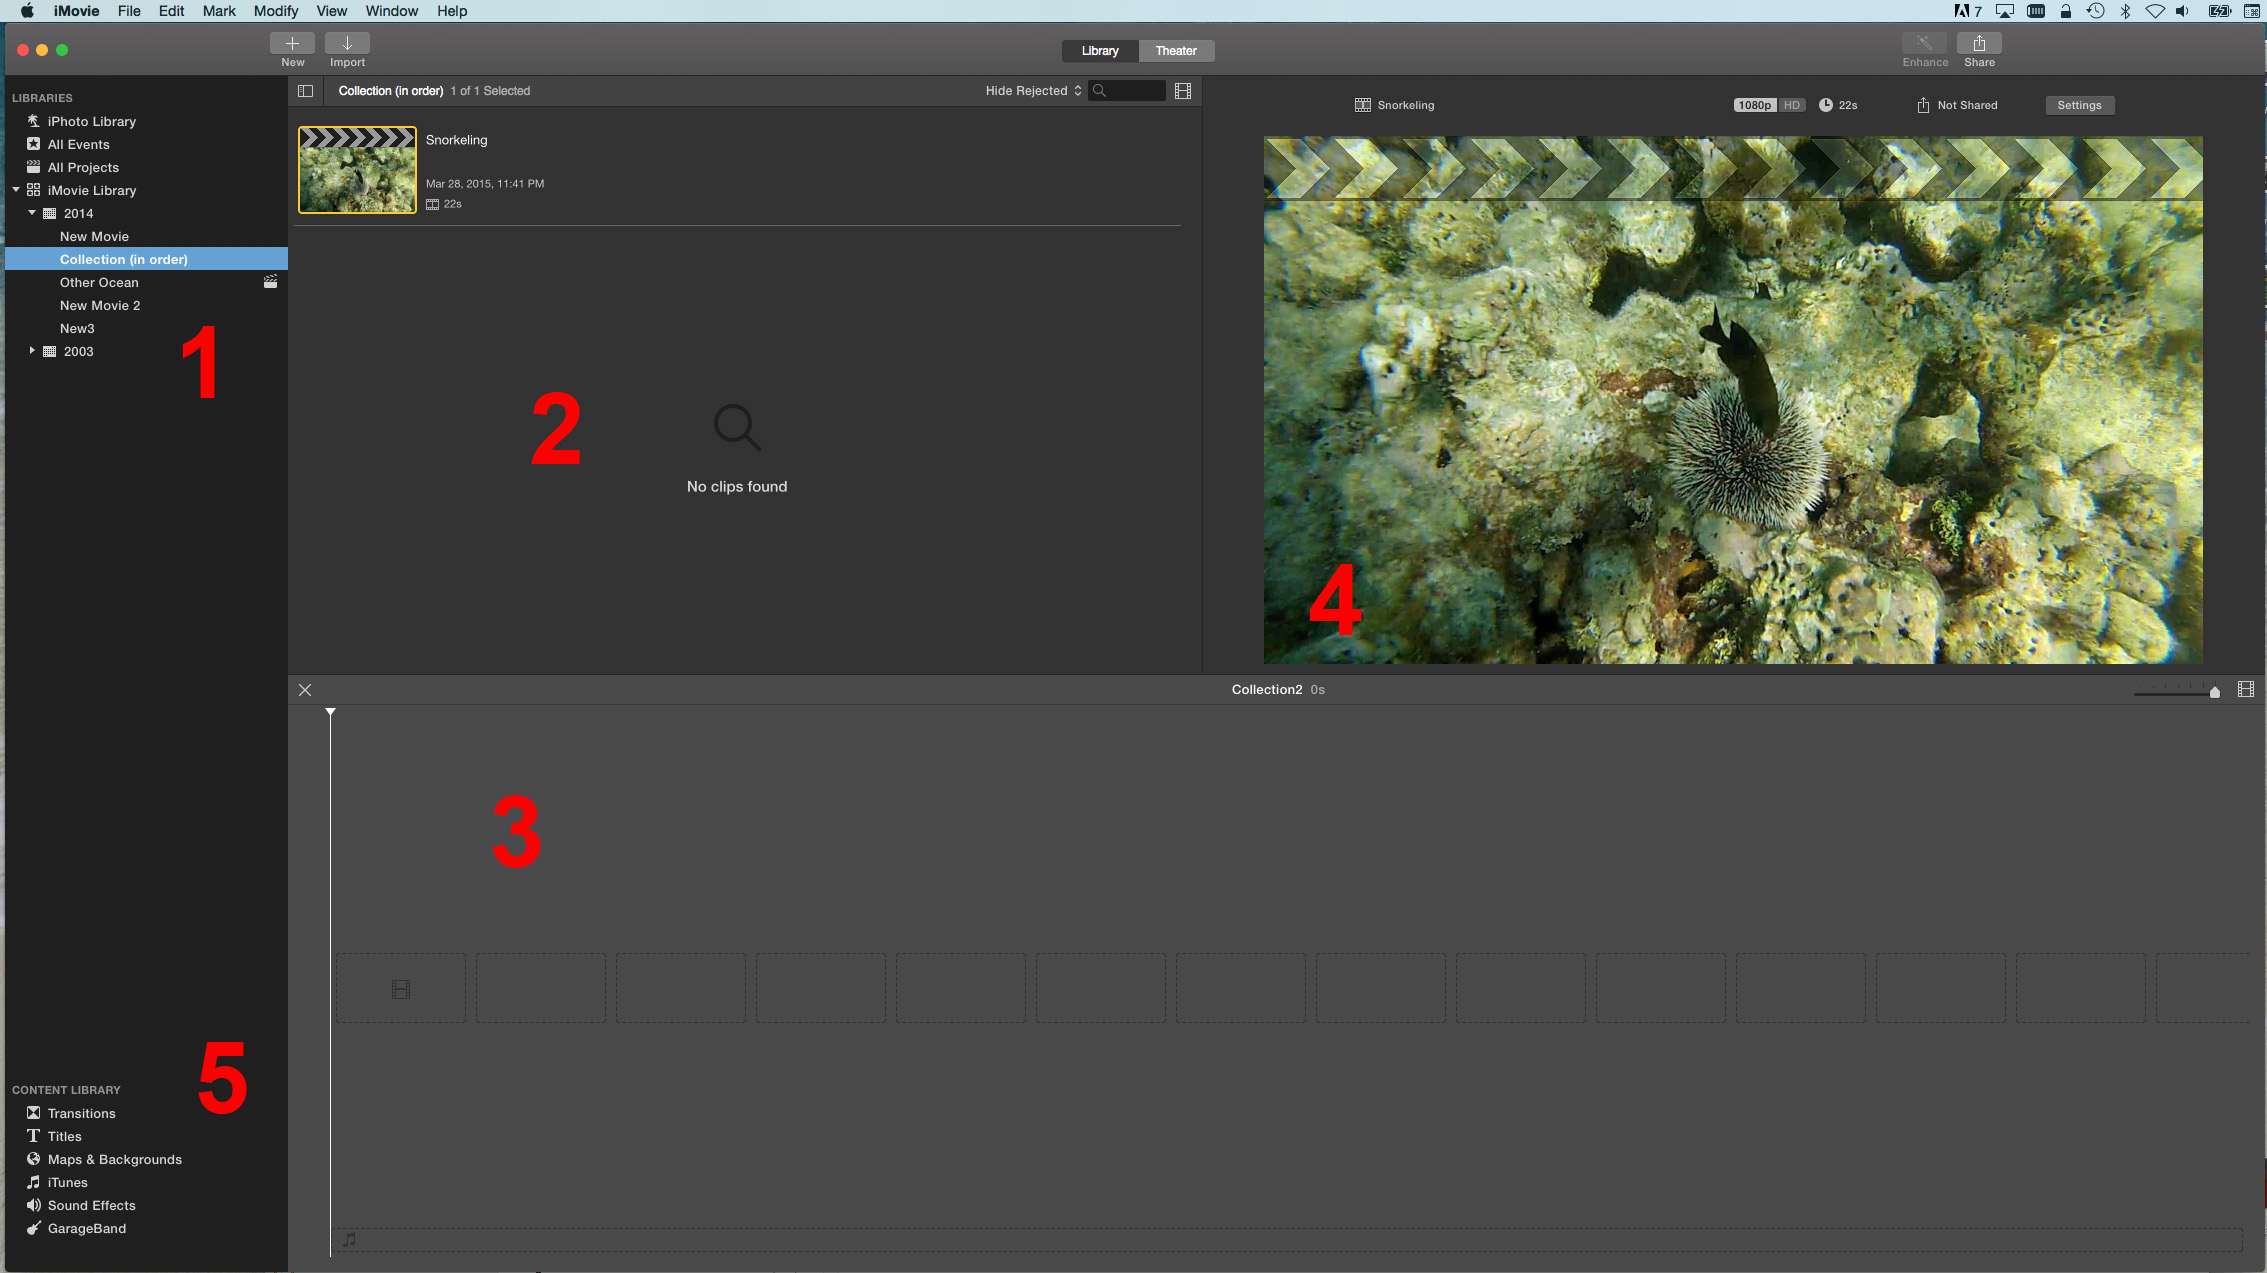
Let the red numbers guide you
Here are the important areas:
- List of all projects (movies) and events (libraries)
- The clip home. When you click on a library in area 1, your clips will show up here. Alternately, if you are dragging clips into iMovie from your desktop, drag them here.
- Where the magic happens. This is the editing space, where your project (movie) is constructed. Drag stuff into this area to add to your project.
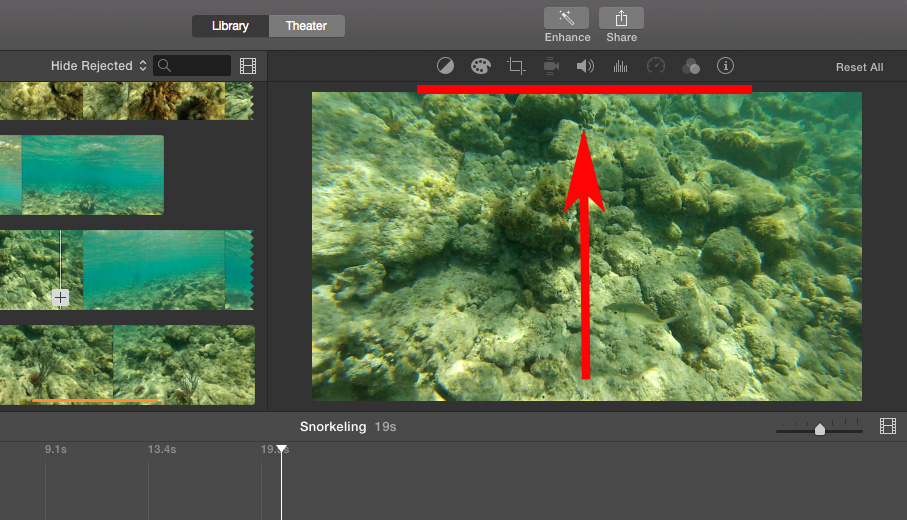
- Preview screen. Wherever your cursor is placed, this shows you a large shot of it. This is also where editing previews and video playback are shown.
- List of extras to add to your movie, like transitions, text, music, sound effects, etc.
Step 1: Importing your clips into the iMovie library
Before you start anything, I recommend you create a new project. This is your film, your vine, your music video, your whatever. At the top of the screen, just click the “New” button to create your movie. Go ahead and name it whatever you want, you can change it later.
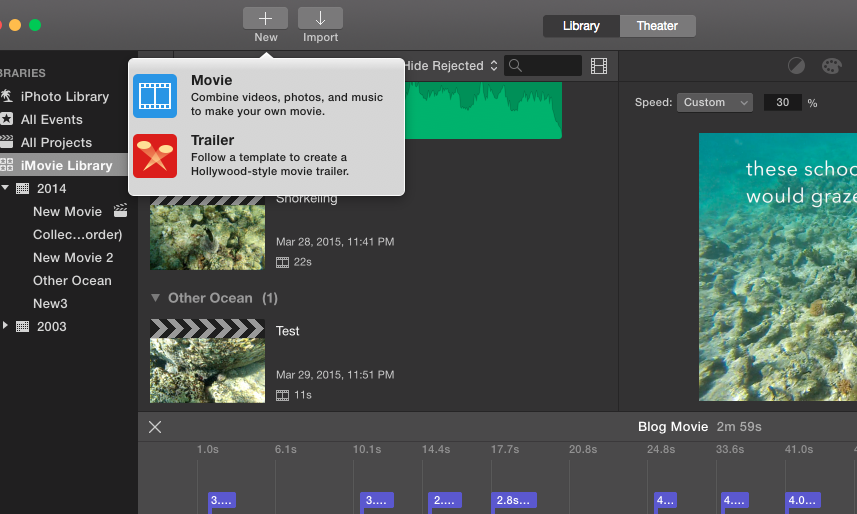
When you want to start editing your movie, just click on the appropriate project to begin. But first, you need to import some clips!
Importing clips can be done with the old drag ‘n drop maneuver, or by manually selecting them by clicking the “Import” button (next to the “New” button). By creating different libraries (or events), you can organize your clips however you like. This is especially helpful when you have a large number of clips to work with (like I did).
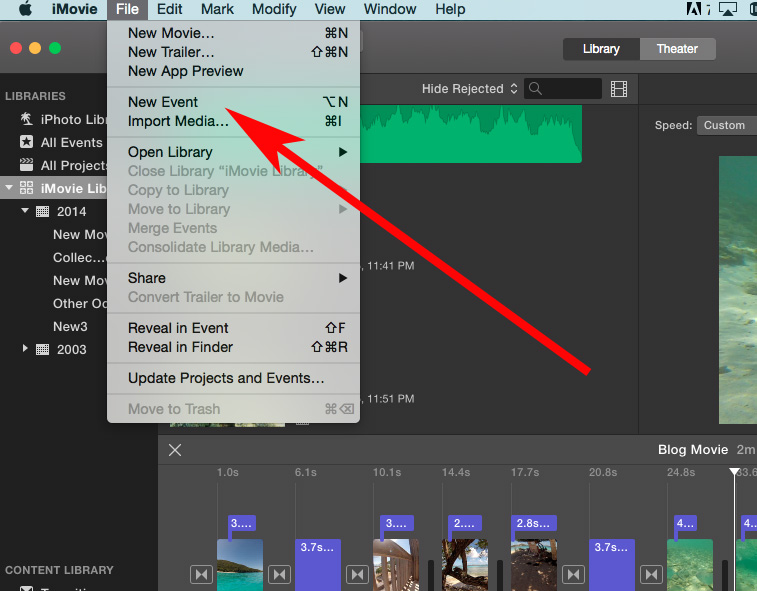
Right click on “iMovie Library” or click File/New Event
I do have to give you a slight warning – don’t download too many clips into iMovie at once. In both versions that I used, I found that if I had too many clips saved into my various libraries, the program would bog down and eventually stall or crash. I worked around this by importing a handful at a time, editing together one or two “scenes” within my project, then deleting the clips from the library once I was done with them. Don’t worry, the files were still on my desktop should I need them later.
Step 2: Cutting and Pasting
Now that you have some clips at the ready, it’s time to slice and dice!
First, we need to get some video footage added to that editing area in the bottom of your screen. If you want to add an entire clip start to finish without trimming it down, simply click on it and drag it down to the editing area, or you can press the little plus sign (+). You’ll find that many functions within this program can be accomplished with a simple drag and drop, this included.
But say you only want a portion of the clip in your final movie. Easy! Just go to the clip in your library, click where you want the portion to begin, then drag the cursor along until the approximate end of your edit and release, which will leave a little yellow box that looks like this:
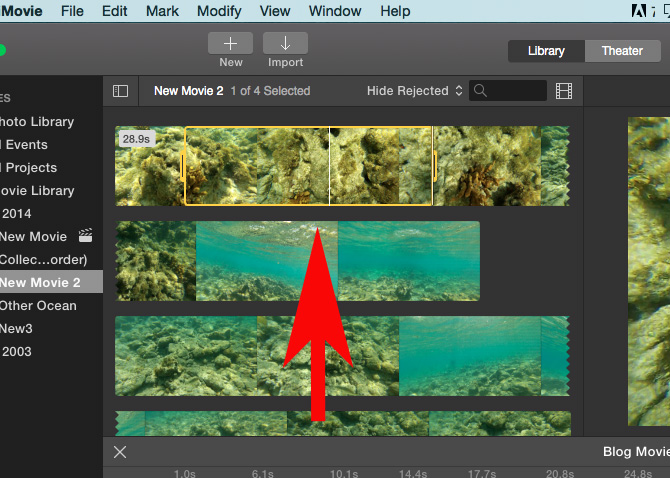
Once it’s highlighted, just drag ‘n drop or hit the + sign. The clip will default to the end of the project, but you can move it around using our trusty stand-by, the drag and drop (I wasn’t lying earlier, was I?). Trimming the clip further is as easy as dragging the ends back and forth, which will increase/decrease the length of the clip. Check out your progress by pressing play in the preview window or hitting the space bar – this will help you trim the ends down to optimal video goodness. You’d be surprised what a difference just a second or two makes. Keep adding clips to build your masterpiece.
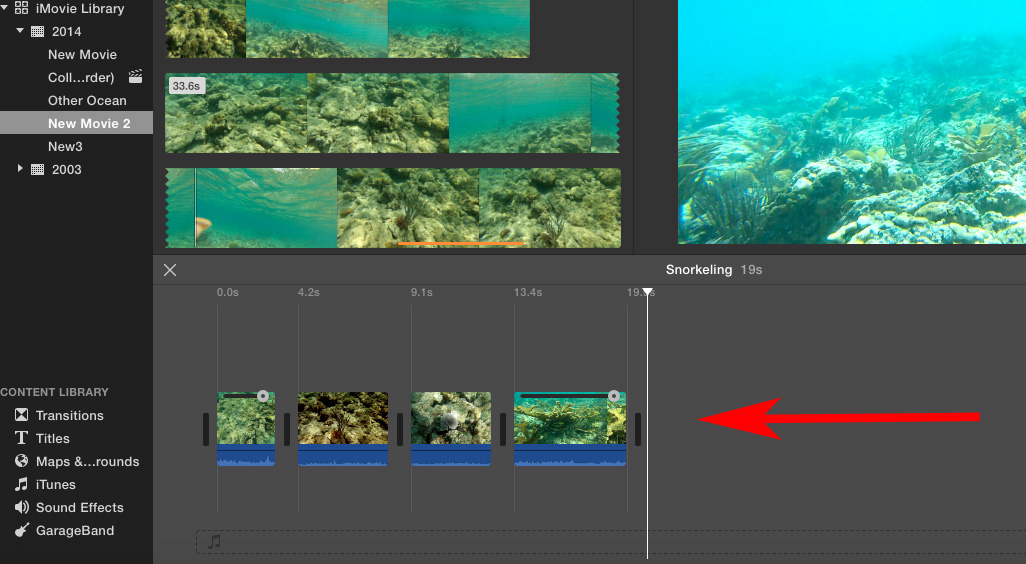
Four little clippies, all in a row
Step 3: Video Editing
This was my favorite upgrade in the new version of iMovie – the easy-to-use editing interface.
These buttons are awesome
Starting from the left, they are:
- Color Balance
- Color Correction
- Cropping
- Stabilization
- Volume
- Noise Reduction
- Speed
- Effects (like filters and such)
- Information
Since explaining them all would take WAY too long, I’m just going to tell you to play around with pressing buttons and sliding slidey things. All of your changes will show up in the preview window, and you can undo anything at any time, so go nuts!
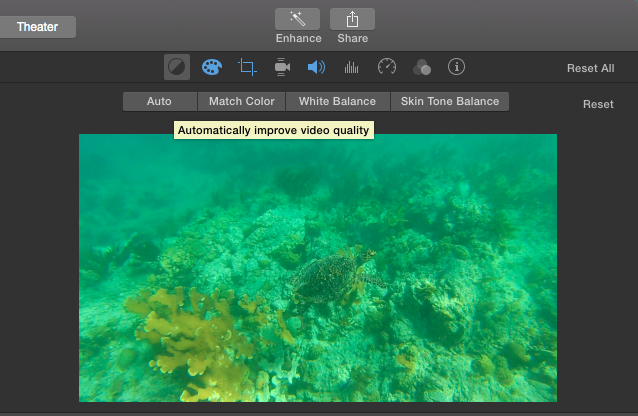
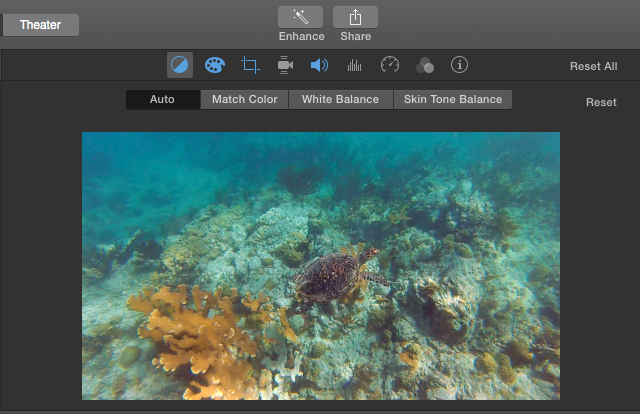
Check out this before and after, just using the Auto button (Color Balance)
One rule to remember – whenever you want to do any sort of editing, make sure that your clip (or transition, audio clip, text box, etc) is highlighted with a yellow border. If nothing is highlighted, you’ll be sitting there pressing buttons and getting nowhere. Keeping this rule in mind will avoid numerous “Why isn’t this working???” moments down the road.
Step 4: Transitions and Text
Now that you have some clips all lined up and edited, it’s time to add some of the fancy-pants stuff. Transitions are the little treats that go between your clips, blending them together in a very professional-like manner. When you click on the “Transitions” button withing the Content Library in the lower left corner of the screen, you’ll be presented with a wide variety of options that show up where your library of clips usually live.

So. Many. Transitions.
Cross dissolves! Fades to black or white! Wipes and slides and all kinds of different transitions are at your fingertips! If you aren’t sure what each one does, simply move your cursor from left to right in the box above the transition name – a preview will show in the upper right corner. Picked your winner? Just drag it down between the clips where you want it to be and it will show up as a little sideways hourglass thing. If you double click on that icon in your movie, you can adjust the duration of the transition. For my movie, I usually stuck to 0.3 seconds, but you do you!
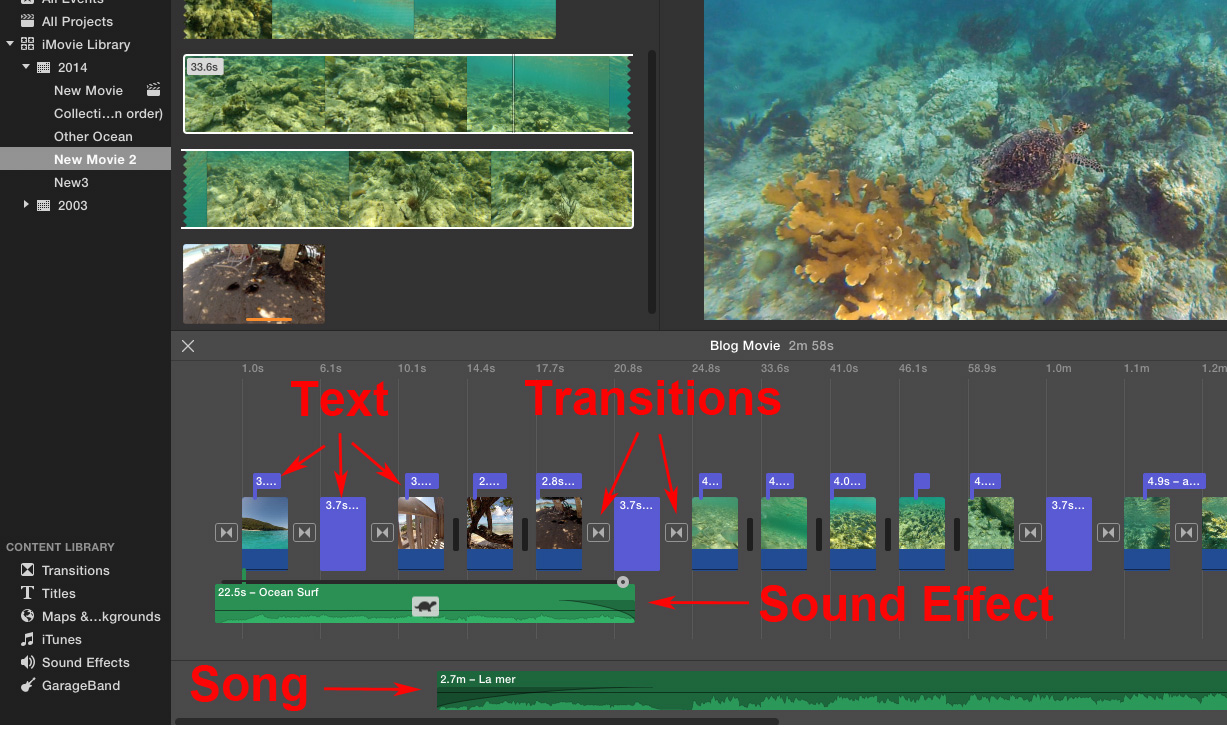
Here’s what my movie ended up looking like with all the extras
Below the Transitions button in the Content Library, you’ll find Titles, which is just a fancy way of saying text boxes. Adding text is pretty similar to transitions, in that a) you can preview them by moving your cursor back and forth, and b) you just drag them in to place. Text can be imposed on top of video footage or dropped between clips to add an interlude of sorts. Examples of both can be found in my snorkeling movie. To adjust the length, just pull/push the ends like you do for video clips.
One unfortunate constraint in iMovie is that you are limited to the pre-set placements and animations. I was able to manipulate things slightly by using some word processing skills (spaces or returns to move text up or down, that kind of thing). Play around with it, knowing that you can always delete what isn’t working.
In this same Content Library area, you also have access to “Maps & Backgrounds”. I didn’t use either of these for my movie, but the concept seems to be the same – drag and drop, move the curser to preview. I could see some great educational uses for the maps, and the backgrounds could spice up screens of text.
Step 5: Audio
This last editing step was one of the hardest for me, purely because I was indecisive – adding audio and music. You’ll notice that I used one sound effect (Ocean Surf) and one song (La Mer), which was pulled from my iTunes library. Both of these audio options are found in the Content Library, along with a version of GarageBand (if you’re familiar with how that works). It took days for me to decide on an appropriate song (because I HAD to have music!). Once I made that excruciating decision, I clicked on iTunes in the lower left corner, found La Mer, then just dragged it down to the editing space. At that point, I moved it back and forth, trying to find the best coordination with the video. Since the song was longer than my video, I had to clip down the end and add a fade in and out. To add audio fades, click on the audio clip and a small grey circle will appear at the beginning and end of the clip. By dragging this circle back and forth, you can instantly fade the music in and out, adjusting the length of the fade to your preferences.
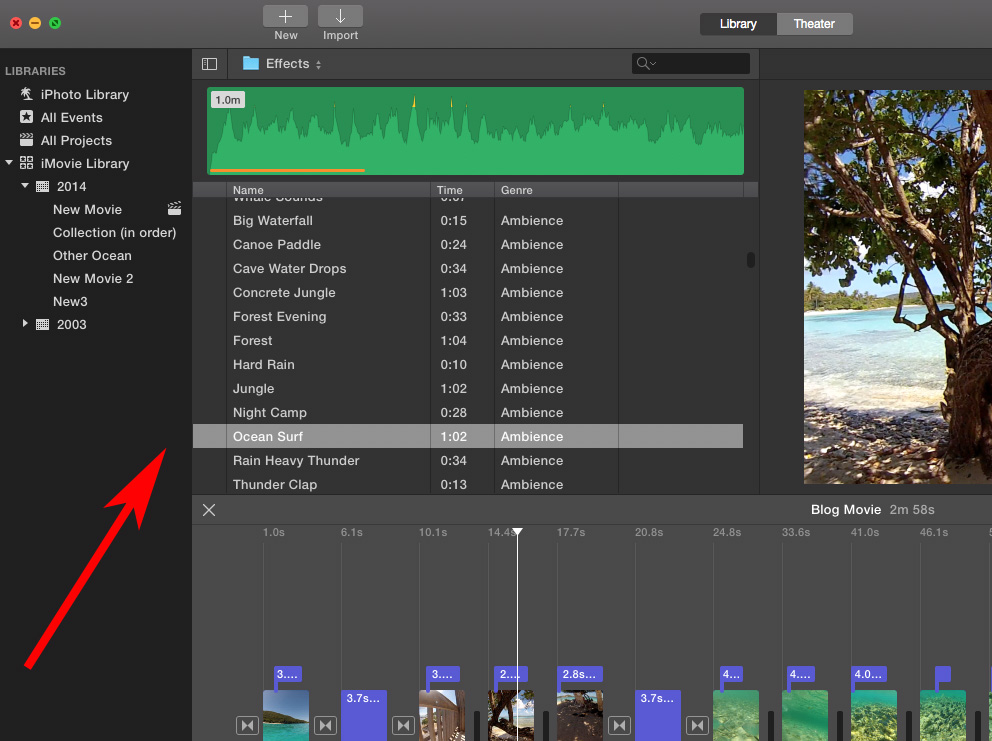
So many sound effects, so little time
This same editing applies to any sound effects that you might want to add to your movie. These effects can also be adjusted for speed if needed, which will also lower the pitch of the effect as well. For my movie, I made the ocean sound slower, resulting in a more soothing sound and stretching the clip to fit my needs.
Throughout this, I knew that I didn’t want to use the audio that was attached to my video clips – it was too slap dash and distracting. By highlighting each video clip and going to the Volume editing button (above the preview screen), I turned the volume down to 0%. In the same manner, I played with the volumes of my effect and song, finding a good balance between the two that worked well for my movie. Again, just play around with editing buttons and click on things to explore – you can always delete the clip and start again if things get too funky for your tastes.
Step 6: Save Your Movie!
After all of this cutting, dragging, and editing, it’s finally time to save your movie! So exciting! I suggest you put your cursor at the beginning of your movie, press the space bar to begin play, then expand it to fill your screen (the two diagonal arrows next to the play button in the preview window). Enlarging your project will help you notice any little quirky things that might irritate you, and now’s the time to change and adjust. I probably watched my movie in this way at least a dozen times before saving, obsessing and tweaking until I was SURE it was right. Once your movie has passed muster, find the “Share” button in the upper right corner. The drop down menu allows you to instantly send it to any number of destinations, but I just chose “File” to save it to my computer.
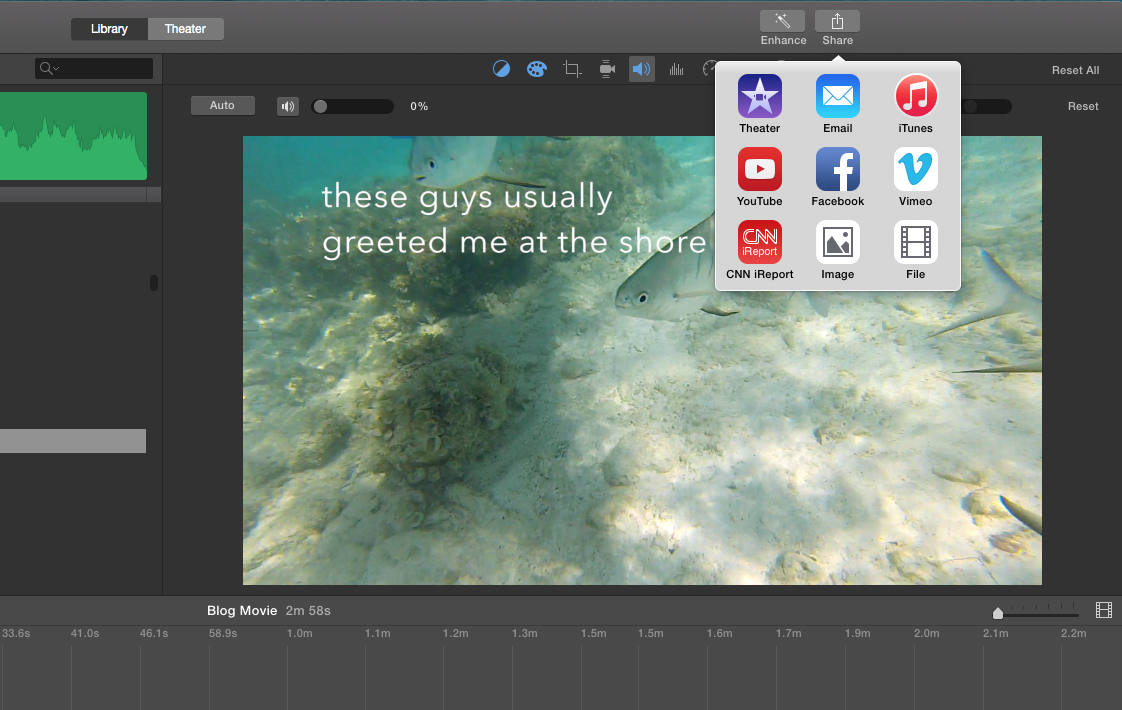
Let’s send it to EVERYONE!
The pop-up screen that follows will allow you to choose the quality, size, and name for your movie, as well as giving you ideas on how large the file is, in case there are any restrictions involved. If you’re like me, you will then send your beautiful creation to every single person you know, basking in their adoration at your amazing directorial skills. Aren’t you proud of yourself – you just made a masterpiece!
Yes, this was a very quick walk-through of a fairly involved program, I know. But I can honestly say, iMovie is SO user-friendly and intuitive that I was able to teach myself pretty much everything simply by exploring and playing. Do you still have questions about iMovie? Feel free to ask me, or come down to the MMLC offices to pick our brains. If I’m available, I’d be happy to give you a little hands-on help in one of our labs. In the meantime, have fun making your movie!